 Here is the complete electrical system! All wired up and new! The red button is the kill switch and the schematics below is the page from the manual showing the complete system. Note that this model does not have lights. It all checks out with the ohm meter and it's ready to go!
Wednesday, December 1, 2010
Day 24: Electrical, Wrapping It Up
Here is the complete electrical system! All wired up and new! The red button is the kill switch and the schematics below is the page from the manual showing the complete system. Note that this model does not have lights. It all checks out with the ohm meter and it's ready to go!
Sunday, November 28, 2010
Day 23: Electrical System and Ignition

 Now that the ignition is all rewired I decided to replace all the wiring on the Montesa, which is not much. The coil wire and kill switch are the only other electrical components on the motorcycle. Then the ignition plate is remounted. The gap is set to 0.015in. It was quite a bit larger and that could have been a contributing factor to the starting problems. I also replaced the mismatched mounting bolts on the coil. They were rusted and just looked horrible. Now they are matched new allen bolts that don't stick out too far . Next, the paint must be removed from the mounting location for the coil to get a good ground. That is the tab sticking below the top tube on the frame with the two holes in the picture below.
 There is a reverse lock washer for the magneto that broke. It was old and very brittle. The manual reccomends replacing it anyway and Vancouver Bolt should have a replacement. That will have to wait until Monday when they are open. Update; Vancouver Bolt www.vancouverbolt.com did not have it but my Whizzer mechanic buddy Dave did. Thanks Dave!
Friday, November 19, 2010
Day 22: Rewired
 Prepping the wire for soldering, and of course routing. It pays to keep attention to detail to get every little thing right. Home Depot had the wire I needed for $4.95 a spool (24 ft/spool) with most of the original colors. The original colors were black, yellow, green and pink. I have replaced pink with red, because I could not find pink wire. Leave it to Spain to use pink. The old pink was so bleached out from time it looked white anyway.


 Here is the finished product before the housing is put on the wire so everyone will know it is good as new!! This should last another 40 years. Good 16 AWG wire with very solid solder points. Now to install the housing over the wire, mount the plate and properly set the points.
Saturday, November 6, 2010
Day 21B: Problem Found!
 Well, well, well. I was traveling around the points with the ohm meter and I was getting some strange readings. Sometimes the readings were good, sometimes not. I am thinking, what the heck! Being the thourough person I am, from my history of working on fighter jets, I decided to be better safe than sorry and take the entire plate off of the engine. This is kind of a hassle because ultimately, this is how the timing on the points occurs. The position of the plate, due to the fact that it is all mechanical, will have to be timed again upon installation. Well when I get the plate off, there is a broken wire behind it. A couple of strands were touching, hence the variable readings. This is the holy grail of why, when I was cranking the kick start in the previous video, there was nothing. I have a feeling we will be rolling soon, stay tuned!
Friday, November 5, 2010
Day 21A: Points Revealed!

Well folks, the points are finally revealed! The nut on the magneto was proving to be a project stopper. I finally dried up on creative, non-destructive ways to get the nut off and took the whole engine down to: www.johnnysmotorcyclerepair.com/. Those guys are really great down there! Johnny himself got that nut off with a couple of special tools in about 5 minutes, and no charge! Thanks Johnny:)! Next, I took it home and got out Dave's gear puller and popped that magneto off. I do, by the way, mean POPPED! I was looking for blood after it came off. No holes in me though, so I continued. Upon inspection under the magneto, I found the stray end of wire grounding out. This could be the problem I have been searching for. The next step is using the ohm meter to check everything and adjust to factory specifications and throw it back together. Now work can start to progress again. Expect more soon!
Saturday, September 25, 2010
Day 20: Ingniting Perfection


Turning on the gas, watching it drip into the clear line, like blood that keeps precious life from slipping away. Cycling the kick start to get the piston at top dead center. Maybe even using the tickler to coax her a little! Checking for neutral, winding up and giving her what for!
When you are constantly met with nothing for all your efforts and you have a good, solid spark; there is only one thing left. Yes, I am talking about the points.
I have now split the case on the other side from the kick start and will be digging in to the points. Fortunately the manual has good testing procedures for checking and timing them. The only problem is the mystery tool used to hold the reverse threaded balance flywheel is just that, a mystery. It feels like the nut was put on with more than the reccommended 72 ft/lbs of torque as well. A little T&E (minus the E) will follow.
I will let you all know how it goes, wish me luck!
Wednesday, June 30, 2010
Day 19: Kick Starter Shaft Repaired!
 Karl's dad, John, comes through again! This is a $166.00 part that he was able to straighten and repair. Thanks John!
Saturday, June 19, 2010
Day 18: Carburetor, Air Filter etc.
 I have been trying to find somewhere to get foam to make a replacement filter. I was tempted to shave some off an existing cushion. Then it hit me, I have this love seat I am trying to haul off to the dump. I started cutting the covering off and was able to harvest enough foam to last another twenty years! In lieu of the spring, I will just use aluminum tape for doing duct work. Problem solved!
We also took the carburetor apart and verified that the current jet is in fact a "U" like the manual specifies.
The replacement part for the kick start is $166.00. We are going to explore some other options and see if that works.
Thanks John Haberbosch at http://rmmontesa.com/ for giving the proper fuel to oil mix! This seems to be one of those closely guarded secrets! 28:1 to as low as 20:1! Otherwise we will be constantly replacing pistons! This little tip will probably save us plenty of heartbreak since we were recommended 40:1 to as low as 30:1! Quite a disparity there! Well even though the piston is easy to replace, I still would not like to do it every week. This was probably what originally killed this bike. Again John, THANKS!
I have been trying to find somewhere to get foam to make a replacement filter. I was tempted to shave some off an existing cushion. Then it hit me, I have this love seat I am trying to haul off to the dump. I started cutting the covering off and was able to harvest enough foam to last another twenty years! In lieu of the spring, I will just use aluminum tape for doing duct work. Problem solved!
We also took the carburetor apart and verified that the current jet is in fact a "U" like the manual specifies.
The replacement part for the kick start is $166.00. We are going to explore some other options and see if that works.
Thanks John Haberbosch at http://rmmontesa.com/ for giving the proper fuel to oil mix! This seems to be one of those closely guarded secrets! 28:1 to as low as 20:1! Otherwise we will be constantly replacing pistons! This little tip will probably save us plenty of heartbreak since we were recommended 40:1 to as low as 30:1! Quite a disparity there! Well even though the piston is easy to replace, I still would not like to do it every week. This was probably what originally killed this bike. Again John, THANKS!
Thursday, June 17, 2010
Day 17: Parts Supplier Found!
Well I got an email back from John at Rocky Mountain Montesa. Below is my whole wish list I am getting pricing for:
Serial # on engine: 28M1448
Foot peg spring: 2820.326
Front Fender and hardware: 0090.0620, 0093.106, 0093.506 and 0092.06
Chain Guard: 2820.306
Rt side case gasket: 2860.113
Exhaust clamps: 3362.063 and 0096.1026028
Air cleaner: 2162.067, 3462.057 and 2862.321
Clutch parts: 0263.107, D5518, 2155.020 (amal 18/838-m) and 2155.021 ( amal 18/839)
Kick Starter parts: 2865.007, 2865.005 and 2865.010.1T
Then lets see about making it street legal while we are at it!
Accessories
Light switch: 2170.065.2J
Tail light: 0070.170152 and 2170.025
Wire harness: 2870.0345J
Fuse box and pin: 0270.203 and 0070.2210204
Mounts: 2835.004 and 2835.005
Head light: 2170.0011J, 0070.2208003 and 0070.140267
Tuesday, June 15, 2010
Day 16: Back To Basics
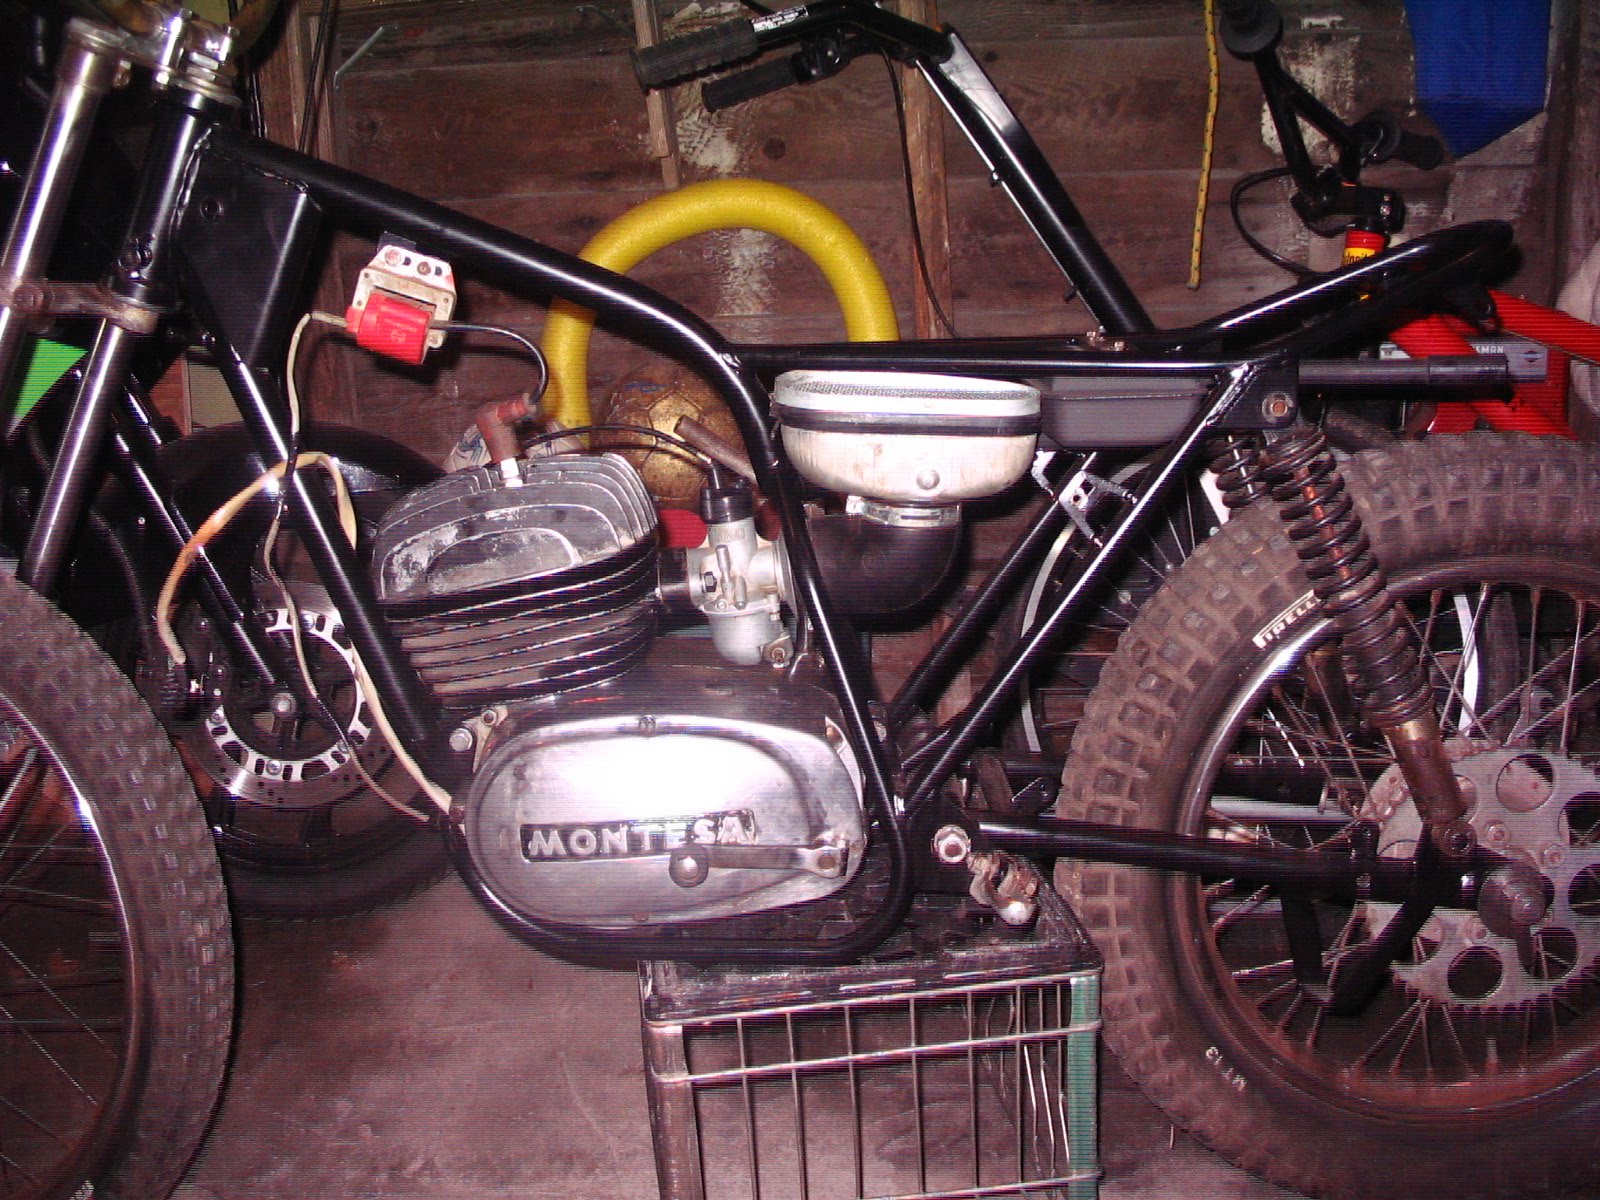
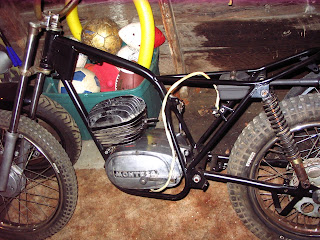
The decision has been made to go back to basics. Since this is a trials bike it took me all of about nine minutes to get the engine free of the frame. The oil drained while some yard work was attended to.
 Once the side cover was removed, the kick starter assembly was visible. It appears that the end of the shaft is bent.
 It took two to loosen this nut. Further inspection showed some loose screws but for the most part, this side of the engine looks beautiful.
 Once the clutch is out, the kick starter shaft is easily removed. A spring must be removed from the shaft of the kick starter pin, but it is not under much tension.
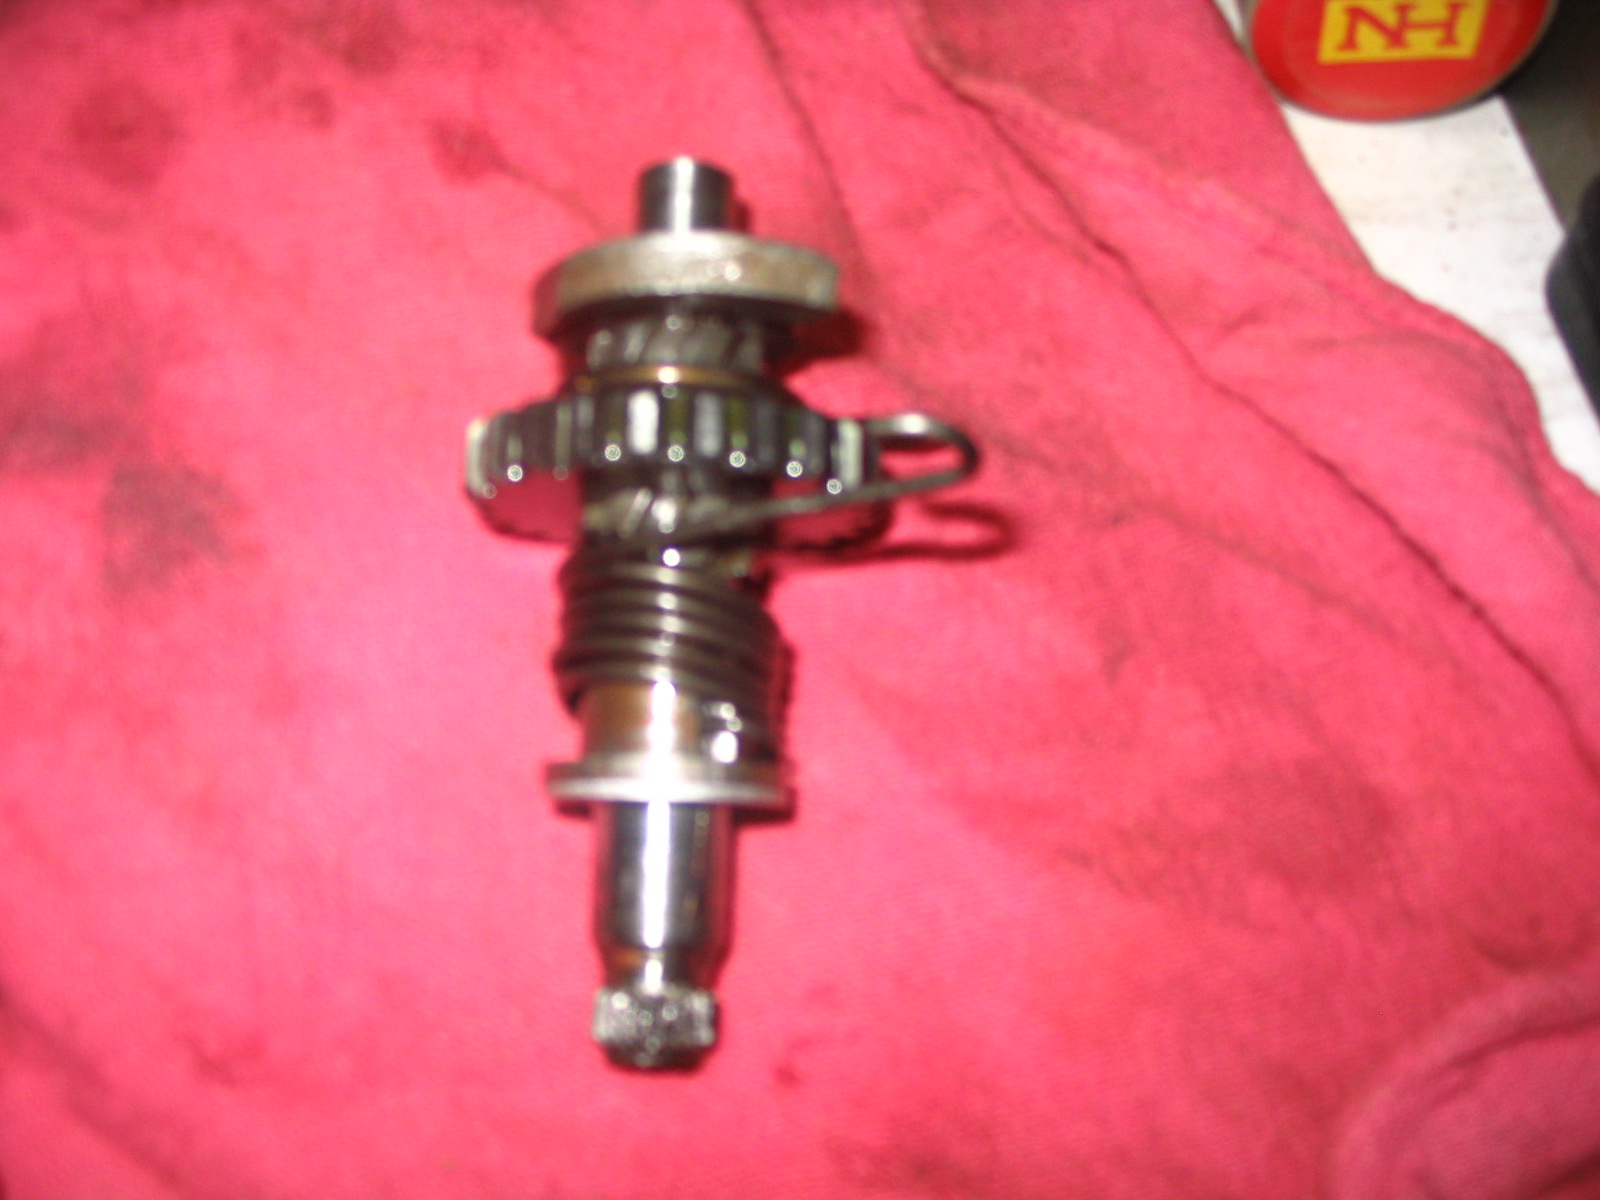 Here is the whole assembly once it is removed. It is difficult to tell from the picture but the broken end of the shaft is also bent at an angle far exceeding optimal.
 The inside looks like it just came off the factory floor! Perfection!
  Here is the layout of the kick starter shaft in order. Now that the pesky shaft has been removed. That did not take long.
I have exhausted my other supplier of parts and he has referred me to a new supplier. I guess I will be getting a list and checking it twice. Here is his website:
Very nice site!
Monday, June 14, 2010
Day 15: Kick Start Kaput!


Well... what can one say?! We are still unable to kick start the old girl. We have spark, we have compression, we even have the spark plug gapped correctly. After gapping the spark plug it started to have another cycle when kicking it. So we started giving her what for. As you can see from the pictures above, the post that the kick starter mounts to, broke off. In the end of the post is a bolt, and that snapped off as well. This will be needed to have an easy out used on it and the end of the post welded. The case also needs some tig work for filler and polished on a spot. The kick starter will also need some work with a grinder.
Tuesday, June 8, 2010
Day 14: Let-Down's and Laments; Trying To Start
Well as you can see by the video, she is not going to start without push starting. I went to Western Cycle Salvage on N. Vancouver Way in Portland, but nothing. No master link, no clutch cable, no bulk foam for an air filter.
Next I went to Johnny's Motorcycle Repair and was able to find out that the chain I have is a 428. Does not say that in either the Clymer's or the stock manual I have. They are at 1510 Washington St, Vancouver, WA. Their website is: www.johnnysmotorcyclerepair.com. I was able to order the master link for $4.28 (including tax). He said within a couple of days. So... I will soak the chain and get it all cleaned up, same with the clutch cable.
Before the test starting above, the top end did not have a gasket so I manufactured one out of a Lucky Charms box and a hole punch. Worked pretty darn good.
Now there is spark, compression, and fuel flow. We are one master link away folks!
Saturday, June 5, 2010
Day 13: Exhaust, Fuel Tank and Starting

Well after last night's monumental success, starting is now imminent! The exhaust, as shown here, is now mounted and finalized!
The only thing keeping her from starting now is the drying out of the fuel tank and mixing the fuel. There was some difficulty removing a pine cone from the inside of the fuel tank but all is good now. I am also informed by Karl, as per Southwest Montesa, the fuel mixture is 42:1. A bit odd of a mixture but what should one expect for 1972?! Other input that we have had say as high as 30:1. I guess we will have to dink with it a bit. Update: mix is 20:1.
The only thing holding us back from starting is the master link on the chain so we can push start her.
I had to manufacture the exhaust gasket. Here is the video:
Friday, June 4, 2010
Day 12: WE HAVE SPARK!
After a solid effort by Karl and myself checking the electrical system, WE HAVE SPARK! She lives! Today has been a monumental success! More to follow...
Day 12b: Electrical System

This is the entire fuse box and electrical system. The only part not shown is the kill switch on the handlebars. As per the manual, the left side is: green/black/red/yellow and the right side (without optional lights) is: Empty/coil/kill switch/empty. It is a very simple system without a battery. The plan is to add lights later and make it street legal.
Day 12a: Brakes and Throttle
 It is my opinion that before going, one must ensure the ability to stop. To facilitate that I have completed the front and rear brake. This included replacing the rear break wing nut, which broke in half and shot across the room. Talk about dodging a bullet! That was two at once! The front brake just needed the cable rehabilitated and some cleaning. It still sticks a little but this bike hasn't been ridden in a long time and I believe some use will get it working good.

The throttle assembly, including the carburetor and cable, needed some extensive rehabilitation to get it to work properly, but all is well now!


Thursday, June 3, 2010
Day 11: Fuel System
 The fuel system is next. As you can see it is very simple on a trials bike. The only part not included here is the carburetor, which is already mounted on the engine. Notice how the gas tank is integrated into the seat to conserve weight and materials. I decided to use brand new tubing after cleaning the fuel filters. Ridgefield True Value Hardware had exactly what I needed on hand and they are always helpful.
 Now after the cleaning and rehab of the existing parts, we have a finished product. Beautiful!
Wednesday, June 2, 2010
Day 10: Continue the Build
Now that most of the problems have been ironed out, the build continues. Aside from a few hiccups, everything is starting to come together. I believe the only things that are needed to actually start the motorcycle are: Clean out the tank, purchase some tubing for a fuel line and connect the electrical. Once those three happen the motorcycle can be started.
Thursday, May 27, 2010
Day 9: The Top End and Mount
Manufacturer nuts are not going to happen. Team member Karl's dad, John D., was given the dimensions that were needed and the top end to use for reference. He quickly cranked out the needed nuts and they work marvelously!
 This project would be dead in the water if not for his gracious help. The top end has to be installed for the engine to be mounted.

 Many thanks again to John! His valuable time and magnificent expertise were key to this phase!
This project would be dead in the water if not for his gracious help. The top end has to be installed for the engine to be mounted.

As you can see, the nuts work and seat perfectly! Now that this dilemma has be easily conquered, progress will be much swifter folks! I have already sealed up the engine and mounted it in the frame.
Many thanks again to John! His valuable time and magnificent expertise were key to this phase!
Thursday, May 6, 2010
Day 8: The Top End
The main reason this Montesa Cota did not run for years was rings. They are very difficult to find. I have gotten a stock set and each one has broken without the slightest hesitation. I don't know if it is from sitting on a shelf for 30 some odd years or if some other factor is involved. They were handled with the up most care.

 The next step was getting new nuts for the studs holding the head on and the top end together. Not so easy folks! The holes for the nuts to attach the studs are not big enough to get a tool on. A bit more research is needed. I do get all my nuts and bolts from Vancouver Bolt. They have taken care of myself and many friends for years! I think, at this point, I will just take the whole engine down there so they can find me a good solution to this problem.
 Sadly; Vancouver Bolt could not supply me with actual parts, but that is not to say that they didn't help. After consulting with their knowledgeable and friendly staff, I know exactly what I need. The actual nuts are 8mm @ 1.25 thread pitch, Allen nuts with enough room for 1/2 inch stud. It is the only thing that will fit down the very narrow 3 inch deep access hole and still be able to get a tool on it.
I wanted something better for the old girl. I did some extensive research and found that I could use a pair of 1985 Honda CR125 rings. I specifically used Wiseco (part#: 2126CS) because I have always had good results and it is a solid product.
Another purchase I made at the same time was a ring installation tool. Probably the last one I will ever have to buy unless I am working on a V8 or larger. I have no information on the product at all except for the sticker on the package. That reads as follows: WPS 39-1005 Ring Installer. I would have to assume, which I do not enjoy doing, that the WPS is for White Power Systems, a well known motorcycle supplier. The tool performed very well and it was extremely simple to use.
 All of these parts I got from the Vancouver Pro-Caliber Motorcycle. I have only two things to say about them. There is nothing that is even remotely close to being "Pro-Caliber" about that company and they will never get another dime of my money. Save yourself the nightmare people and shop somewhere else! You have been warned!
 The next step was getting new nuts for the studs holding the head on and the top end together. Not so easy folks! The holes for the nuts to attach the studs are not big enough to get a tool on. A bit more research is needed. I do get all my nuts and bolts from Vancouver Bolt. They have taken care of myself and many friends for years! I think, at this point, I will just take the whole engine down there so they can find me a good solution to this problem.
 Sadly; Vancouver Bolt could not supply me with actual parts, but that is not to say that they didn't help. After consulting with their knowledgeable and friendly staff, I know exactly what I need. The actual nuts are 8mm @ 1.25 thread pitch, Allen nuts with enough room for 1/2 inch stud. It is the only thing that will fit down the very narrow 3 inch deep access hole and still be able to get a tool on it.
 Folks, if you don't know what the heck you need and are starting a project, I highly recommend starting at Vancouver Bolt.
Tuesday, March 9, 2010
Day 7: Rolling Chassis
 Once the frame was back and the prep work done, the build can begin! Above is a picture of the little lady in her current state. The swing arm and forks now move superbly after cleaning and repacking of the bearings. It is not really clear in the manual about which side of the forks some parts go on so we are trying to figure it out. Of special note, the small tab on the speedometer broke off when trying to reassemble. Karl welded on another tab and it works marvelous! Superb save Karl! In the picture below it is the tab sticking up. The day before that critical tab did not exist.

Saturday, February 27, 2010
Day 6: Fresh Paint
 Oh the joy and happiness that comes with a freshly painted frame and swing arm! It is not just paint folks! This parts are heated to about 480 degrees and powder coated. Then the whole menagerie is covered with three layers of clear! It looks flawless and beautiful! The swing arm is too wide now to fit so some of the powder coating must be sanded. During the time I was waiting for the frame, I took all the remaining parts and started grinding the rust off of them. A very tedious task, but important still. More good news is that I just heard from Speed and Sport and they are sending the ordered parts. I will have the rings and other various parts, listed previously, very soon. She will ride again!
Friday, January 22, 2010
Day 5: The Quest for Clean
 Well today I decided to give the old girl a bath and see if anything could come clean. The rims were especially bad. Soap and water did not even put a dent in the rims. So far steel wool and a huge amount of elbow grease is my only friend there. The extensive paint chipping will be left until the frame can be sandblasted and powder coated. The grease on the front forks was a real tough one. Soap and water: No. Scrub brush: I wish! Looks like it is going to be rags and thinner. I started to break down the frame for painting. Here is what I have left now.
 Not surprising is the moss growing in some parts. It looks like it was just starting to get a foothold.
Tuesday, January 19, 2010
Day 4b: Needed Parts
Parts, parts, parts! This is the real challenge. Getting parts for a 40+ year old motorcycle. If anyone has a line on any of the parts below, drop me a line and I will be happy to purchase them or put your logo on this blog and give you credit, mention and links if you donate them. Thanks:)
Montesa Cota 123 28M1448 Missing Parts (of course I will be adding to this list so check back regularly):
Piston Rings, pt#: 2860.022/1s & 2860.022/2s
Piston clips, pt#: D6021 (x2)
Engine to head gasket, pt#: 2860.024
Carb to head gasket, pt#: 3462.108 (x2)
Carb top cover, pt#: 2862.304
Throttle cable, pt#: 2862.053
Foam air filter, pt#: 2162.067
Plastic ring for air filter, pt#: 2462.057
Carb gasket, part#'s: AMAL 622/073 & AMAL 622/101
Day 4a: The Verification and Cleaning of the Carb

Before even thinking in the long term of happily puttering around at about 2.5 mph, scaling boulders, climbing overhangs and riding over the occasional car in traffic; the carburetor must be fully cleaned and all parts must be in perfect working order. This is a foundation piece to a motorcycle project like this. Everything else can be in perfect working order, but if the carb is not adjusted properly and in perfect working order, the motorcycle just won't start, no-how, no-way!
Upon breaking down the carb a few things become clear.
First, the motorcycle has not been run in a long time and the carb has not been stored with gas in it. No build up, all parts move smoothly and everything is clean.
Second, it looks like there are two parts missing. One is part# AMAL 622/101 which is the carb gasket that mates the carb to the head. The other is the gasket that mates the bowl to the body, part# AMAL 622/073.
I may just get a sheet of gasket material and start fabricating my own gaskets for this motorcycle. Making templates as I go so future gasket needs can be easily fabricated.
Monday, January 18, 2010
Day 3: The Search for Rings

Well folks, this is proving to be quite the task. I started by going to: Metacrawler and doing a search for the Montesa dealership page. That brought me to US Montesa. Two entries came up, Beaverton Honda and Apex Sports. The number for Beaverton Honda was disonnected so I tried Apex Sports. I was then informed that Lewis Sport, in California, now handled all trials bike parts. Mandy at Lewis Sports said I needed to call Matt at Speed and Sport (530-878-0700) and he could probably set me up with a set that would work. After talking to him he recommended getting the actual measurements, 53.60mm for the cylinder/piston and 52.40mm for the notch the rings fit in, and call back. He could probably get a pair together. Still I am unable to date the bike to the correct year of manufacture. Matt did give me a clue though. The M number on the frame and engine puts it in a bracket of dates. Tomorrow will tell.
If anyone can direct me to someone who has parts for the Montesa Cota 123, pre 1975, especially rings, let me know! Thanks;)
Thursday, January 14, 2010
Day 2: Clean-up
 Cleaning up the years of misery attached to something so precious can be a daunting task. For example here is a picture of the air filter after preparing it for cleaning. There isn't much left. The screens will be salvaged, new foam purchased and a new filter fabricated to the specs of the original. The next picture is of the parts that have been cleaned so far. The metal screens are what is left of the air filter. The fender and some carburetor parts not small enough to get lost in the dishwasher. Yes folks, man's best friend; the dishwasher. You wouldn't believe what you can run through there. Just try to avoid the really greasy items.

Day 1: Reception and History


...And this is how it begins. A Montesa Cota 123 (so far dated at between 1965-1971, this will get pinned down later) last seen by myself when I was in high school and the frame had just been painted. The things 25 years under a tree will do to a freshly painted frame. The cylinder was bored out and sleeved to the original specs and the only thing the "package" is missing are the rings and the kick starter.
Subscribe to:
Comments (Atom)
